From Sketch to Sales.
Turn Original Art into Print
How To Turn Original Art Into Greeting Cards
Turning original art into a printed card..
This post will primarily focus on turning original artwork into printed cards as this is where my own experience lies, however there are many ways to produce greeting cards from handmade originals to entirely digital designs. I fully recommend a read of 'House of Cards' written by @justacard founder Sarah Hamilton for inspiration from many card makers who share tips from their own creative fields.
Step One: Creating your image
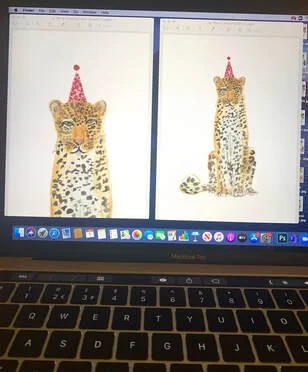
I create my greetings cards from my original illustrations. I draw traditionally using paint, paper, pens and pencils. I love creating this way but to produce more than one card these have to be turned into a digital file.
Getting your original work from paper onto a computer screen and edited to print can feel a little daunting when you are first starting out especially if you are not particularly technical. It is a process I struggled with when I first started out, almost to the point that I didn't continue any further but it is actually a fairly simple process that does not have to be over complicated, if you have felt like giving up at this stage please read further.
Step Two: Scanning
When printing your work digitally you'll need to have this saved in CMYK format. CMYK is a four colour print process using Cyan, Magenta, Yellow and Key (black) think about the cartridges that you load into a colour printer. If you are sending your cards to a printers then they will likely request a CMYK PDF file. Printing from a CMYK PDF will give you an almost identical print to you original artwork.
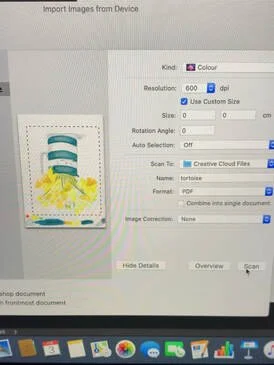
You can easily create this by scanning your original image. I scan my artwork myself using the Cannon Scan LIDE 400 scanner which I can recommend. After some research for the price this seemed to be one of the best on the markets. It does only scan up to A4 though so for larger work you may need to consider another option.
I have in the past used Rymans who provide an inexpensive service especially if you are scanning more than one image.
However you scan you'll need to make sure that you set the dpi to a minimum of 300 dpi. Ideally i'd recommend scanning at 600 dpi. Dpi means dots per inch it impacts the resolution, the more dots per inch the sharper the image you will get. This is particularly noticeable if you are enlarging a small piece of art work. I always scan to 600 dpi and I'm always happy with the results.
Make sure to save your scan as a PDF file or as I have discovered importing your scan directly into Photoshop saves quite a bit of time with saving down files.
Step 3: Editing + Formatting
Now that you have turned your original artwork into a digital file you'll want to size this correctly so that it can be sent to the printers. I'd recommend using an Adobe package to edit and format your image for print. I use Photoshop which I find excellent for this but you will need to subscribe to a monthly package. I use their basic package which costs me £9.99 a month.
If you're just starting out perhaps you could make use of their free trial before investing in a monthly subscription and get everything prepared in advance as it only lasts 7 days.
When creating your templates you will want to set your canvas size to the size of your cards that will be printed. My cards are all A6 so I ensure to use these dimensions when I create a new canvas. Many printers may have templates which you can use to upload your artwork onto. I prefer to create my own but it's entirely up to you.
If scanning you can import your image directly into photoshop which I've found saves me quite a bit of time or if you have scanned and saved down your PDF you will need to place an embedded image by going to File - Place Embedded and select the image. You'll then be able to enlarge or reduce the scale of this until you are happy.
I will not go into too much detail of photoshop in this blog as I may write a separate blog on things I have learnt using photoshop.
Step 4 - Printing + Packing
If you have already have a printers in mind the next step would be to send them your artwork. Some printers may ask you to upload your artwork through their website and they may have templates already set up to make this easier for you. I prefer to use my own templates and send my files directly using 'we transfer'. We Transfer is a website enabling you to send large files up to 2GB for free.
If you don't have printers a good place to start is simply searching on-line you'll probably want to find somewhere that has low minimum order quantities when you are starting out. It's always a good idea to ask for proofs as you may have missed editing out some marks that you don't want to appear. Getting the right card stock is also important you would be amazed at how much of a difference this can make to the colour and quality of your print.
If you are struggling to find somewhere Printed.com are always a good place to start as they have very low minimum order quantity and a quick turn around however they are fairly expensive so if you want to start printing larger quantities its probably worth looking around. I use The Imaging Centre
Of course you could also print these using a home printer and I know many successful businesses that do this. For me I knew I wanted a high quality professional finish and I wasn't confident that I would be able to achieve this myself at the time. But with the right printer and card stock there is no reason not to consider this.
I always use the same quality, card size and weight to keep my range consistent. My cards are A6 and printed onto a 300gsm luxury card stock which has a slight texture. This is FSC approved which means it has been responsibly sourced and approved by the forestry commission. I use 100% recycled Kraft envelopes with card clasp stickers from Acorn Print Labels or biodegradable corn starch wraps from EcoCraft
Step 4: Selling
I started selling my cards at a local events. I'd spent quite a few months prior to this designing my range which I created from illustrations that I had been creating for over a year. I borrowed a gazebo and hired a table. Thankfully the event and day was a success and from that I then spent another couple of months creating my Etsy shop and approaching a local artisan market to me where I then had a regular stall. More recently I have launched Wholesale through doing a TradeShow I'd suggest these routes are good places to start off.
You Can Read My Other Blogs Pitching Up which is about markets and Starting Out in Wholesale Here
I hope that you have found this helpful I've written this because I know how hard it is to sometimes start something and I hope that it will help show you how I have done this and inspire you to do the same. I would love for you to leave me a message if you have found this useful in anyway.


